

How To Winterize A Inboard Boat
How Winterize A Inboard Boat?
Most boaters know that it is necessary to winterize their boat at the conclusion of the boating season, but very few understand why.
Water is an excellent solvent and can draw in contaminants from any surface it comes into contact with, causing all kinds of problems for a boat’s internal systems: Arguably, most importantly, these contaminants can cause serious damage to an engine’s internal parts. So it is very important that the boat owner takes the time and goes through a thorough winterization process.
The following is a step-by-step guide for how to winterize an inboard boat:
Step 1 – Prepare Your Boat For Storage
Winterizing boats can be done at any time during the off-season, but for best results, it is recommended that you wait until the water has cooled to less than 50 degrees Fahrenheit. This will make sure all of your boat’s systems are thoroughly chilled prior to starting the winterization process.
Step 2 – Prepare the Engine and Remove the Water from Engines Components
After your boat has been prepared for storage, the next step is to remove all of the water from the engine’s components. The easiest way to do this is with a garden hose and a spray nozzle that will produce a solid stream of water. Spray every nook and cranny you can get, too, including places like manifolds, exhaust ports, cylinder heads, engine blocks, and any other areas you can easily reach. You may need to take off parts like the thermostat housing or an oil pan to access these components.
Step 3 – Drain Fuel Tanks
After your boat’s systems are all dried out, it is time to drain the fuel tanks. The easiest way to do this (and what most professionals will recommend) is with a turkey baster. Take the end of the baster and stick it over one side of each tank fitting. Then suck on the other end until enough fuel has been removed that atmospheric pressure allows more fuel to be drawn into the baster (don’t drink the fuel). Once you have gotten as much as you can from each tank, use a funnel to pour the fuel from the baster into an approved container. Repeat this process until both tanks have been completely emptied.
Step 4 – Remove all Liquids from your Boat's Components
Once the fuel tanks have been drained, it is time to remove all of the liquids from your boat’s components. You can use a turkey baster for this as well, or you can use other approved methods like water displacement (dielectric grease) or suction pump (vacuum pump). Whichever method you choose, be sure to work through every nook and cranny possible: Start with things like your engine block and manifolds, then move on to gas tank fillers and vent lines. Be sure NOT to dump these fluids onto the ground or into bodies of water (it is illegal and extremely toxic to the environment).
Step 5 – Clean your Boat Before Storage
Now that your boat’s components are all dried out, it is time to wash them. The best way to do this is by using a mixture of dish detergent and hot tap water. Mix about two tablespoons of the detergent with one gallon of hot tap water, then scrub everything down thoroughly. You don’t need to rinse after doing this! Just let your boat air dry before putting it away for storage.
Step 6 – Place Oil in Components
Before you place your boat into storage, it is important that you fill every hole possible with oil or grease. This includes things like cover bolts, access plates, and engine oil fillers. In particular, you should grease or oil the places where your engine oils drain from (this is typically an area near your starter). Doing this will ensure that your boat’s components stay fresh until they are needed again, and it also keeps them
Step 7 – Fill Batteries With Water
After you have cleaned all of your boat’s components, it is time to fill the batteries with water. This is a VERY important step because if you don’t do it correctly, corrosion can form on the battery posts, which will slowly eat away at them until they become useless. To properly fill your batteries with water, all you need to do is remove their caps, then drop one tablespoon worth of water directly into each battery cell. This will top them off but not overfill them. Be sure to wipe down the outside of each battery, then replace their caps before placing them into storage.
Step 8 – Clean Battery Posts
If you have lead-acid batteries, it is important that you clean all of the corrosion off of their posts before putting them away for storage. Doing this will ensure that they are ready for use whenever you need them again and will also keep your boat’s electrical system safe while it is sitting in storage during the winter months. To remove corrosion from your battery, the post simply places a small amount of baking soda on a wire brush and scrub the region thoroughly (don’t get any inside your battery). Once all buildup has been removed, rinse with hot water, dry off your battery with a towel, then place it into storage.
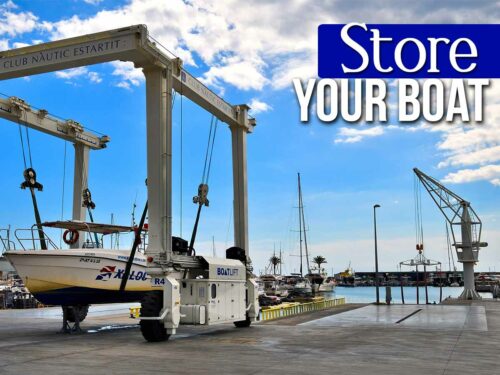
Step 9 – Store Your Boat
Once you have completed all of the previous steps, your boat is now ready to be stored away for the winter months. If you are storing it in an unheated building, then be sure to cover it to protect it from dust and debris that might fall on top of it. If you don’t have good indoor storage, then a garage or carport will suffice as long as there is adequate protection against sunlight and flooding during heavy rains.
Regardless of where you store your boat, make sure that moisture can’t get inside somehow (if this happens, condensation can form, which will slowly corrode your boat’s components). Once you’ve chosen a place to store your boat, simply drop an old blanket or sheet over it, then cover the top with plastic sheeting. Secure this in place using bungee cords or rope if necessary.
Step 10 – Plug Boat's Drain Holes
The final step is to take a couple of rags and stuff them into your boat’s drain holes so that water cannot drip inside during rainstorms. Be sure to do this for all non-sealed drain holes, but remember not to block the ones which might let water out (i.e. bilge pump outlets). This will ensure that your boat remains dry while its components get covered with oil or grease before being stored away for the winter months.
Conclusion
There you have it! If you follow these steps on your boat before storing it away for the winter months, then restoring it in the spring will be quick and easy. Just make sure to use the same products during spring restoration that you used on your boat prior to putting it into storage (e.g. dry gas fuel treatment, oil, etc.).
Remember that in our blog you will learn the best tips, advice on maritime navigation and everything related to nautical.